Model Configuration
In the Model Configuration module, you can connect various types of AI models, including large language models, vector models, and vision language models. Nexent supports multiple model providers, allowing you to flexibly choose the most suitable models for your needs.
🔄 Sync ModelEngine Models
Nexent will soon support seamless integration with the ModelEngine platform, enabling automatic synchronization and use of all models you have deployed on ModelEngine. Stay tuned!
🛠️ Add Custom Models
Add a Single Model
- Add a custom model
- Click the "Add Custom Model" button to open the add model dialog.
- Select model type
- Click the model type dropdown and select the type you want to add (Large Language Model/Embedding Model/Vision Language Model).
- Configure model parameters
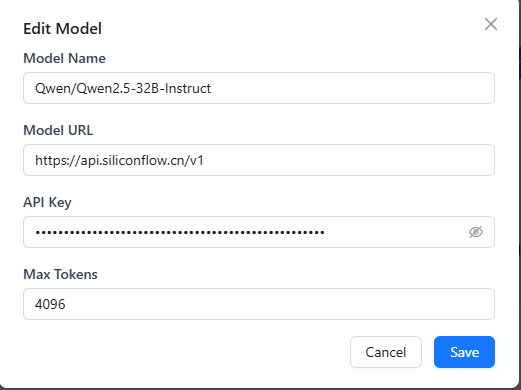
- Model Name (required): Enter the model name as used in requests.
- Display Name: Optionally set a display name for the model (defaults to the model name).
- Model URL (required): Enter the API endpoint provided by the model provider.
- API Key: Enter your API key.
- Connectivity Verification
- Click the "Verify" button. The system will send a test request and return the result.
- Save Model
- After configuration, click "Add" to add the model to the available models list.

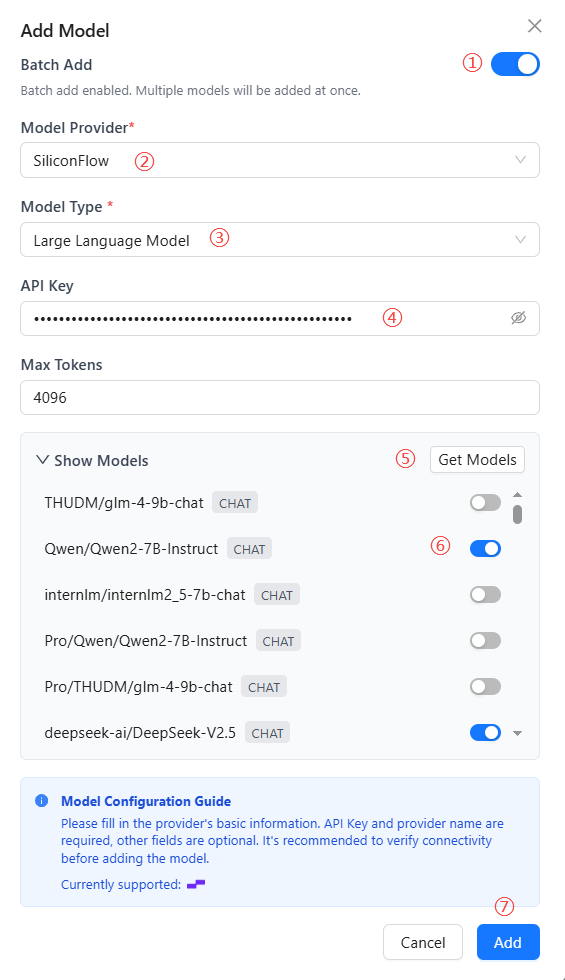
Batch Add Models
To improve import efficiency, Nexent provides a batch model import feature.
- Batch Add Models
- In the add model dialog, enable the batch add switch.
- Select Model Provider
- Click the model provider dropdown and select a provider.
- Select Model Type
- Click the model type dropdown and select the type you want to add (LLM/Vector/Visual).
- Enter API Key (required)
- Enter your API key.
- Get Models
- Click the "Get Models" button to retrieve a list of models.
- Select Models
- The fetched models are disabled by default. You need to manually enable the models you want to use.
- Save Models
- After configuration, click "add" to add all selected models to the available models list.
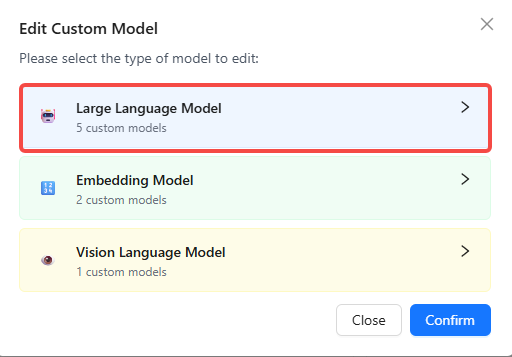
🔧 Edit Custom Models
When you need to edit model configurations or delete models you no longer use, follow these steps:
- Click the "Edit Custom Models" button.
- Select the model type to edit or delete (LLM/Vector/Visual).
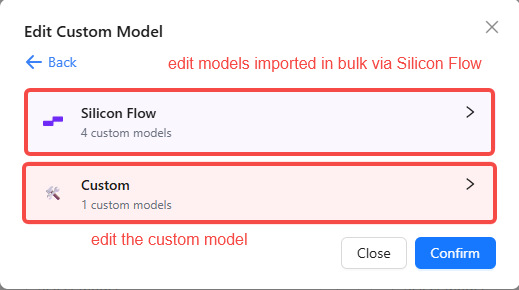
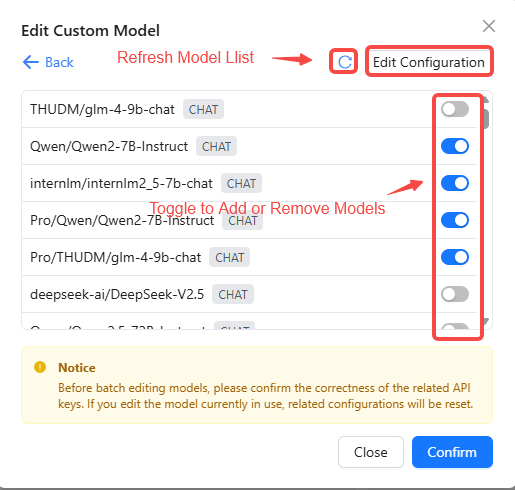
- Choose whether to batch edit models or edit a single-instance custom model.
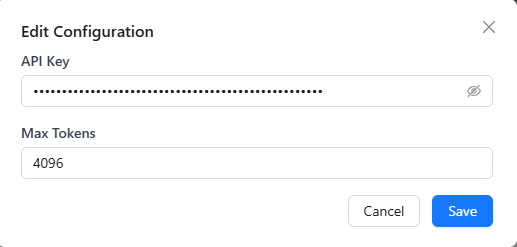
- For batch edits, you can toggle model switches and add or remove models. Click the "Edit Configuration" button in the top-right to apply configuration edits to the selected models in bulk.
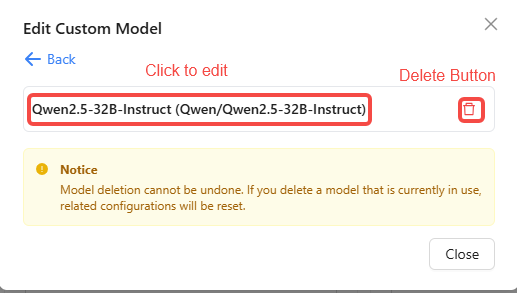
- If you are editing a single-instance custom model, click the delete button 🗑️ to remove the target model. To edit its configuration, click the model name to open the edit dialog.
⚙️ Configure System Models
After adding models, you need to configure the system base model, which will be used for basic functions such as title generation and real-time file reading. When agents are running, you can specify specific models for each agent.
Base Model Configuration
The system base model is used for core platform functions, including:
- Title generation
- Real-time file reading
- Basic text processing
Configuration Steps:
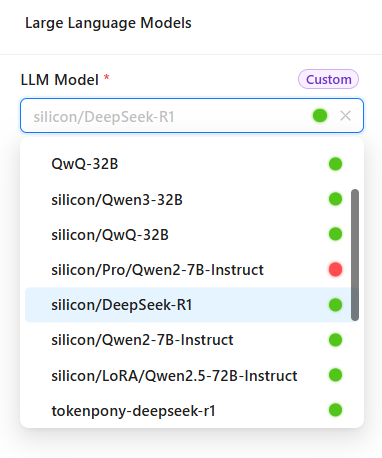
- Click the base model dropdown to select a model from the added large language models as the system base model.
Agent Model Configuration
When creating and configuring agents, you can specify specific models for each agent:
- Each agent can independently select the large language model to use
- Support configuring different models for different agents to meet various business needs
- Agent model configuration will be set in the agent configuration page
Vector Model
Vector models are primarily used for vectorizing text, images, and other data in knowledge bases, serving as the foundation for efficient retrieval and semantic understanding. Configuring appropriate vector models can significantly improve knowledge base search accuracy and multimodal data processing capabilities.
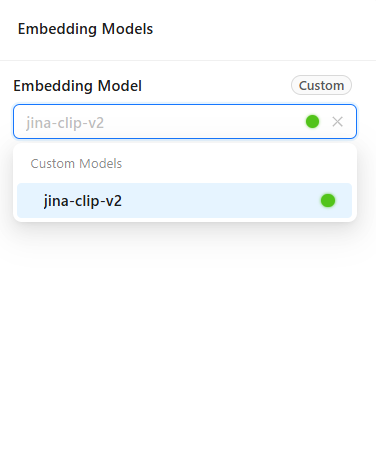
- Click the vector model dropdown to select from the added vector models.
Multimodal Model
Multimodal models combine visual and language capabilities, enabling handling of complex scenarios involving text, images, and other information types. For example, when uploading image files in the chat interface, the system automatically calls multimodal models for content analysis and intelligent conversation.
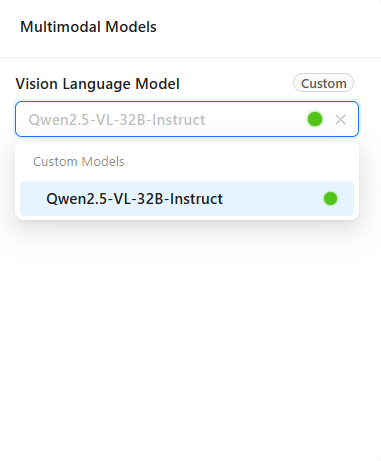
- Click the vision language model dropdown to select from the added vision language models.
✅ Check Model Connectivity
Regularly checking model connectivity is important for stable system operation. With the connectivity check feature, you can promptly discover and resolve model connection issues, ensuring service continuity and reliability.
Check Process:
- Click the "Check Model Connectivity" button
- The system will automatically test the connection status of all configured system models
Status Indicators:
- 🔵 Blue dot: Checking, please wait
- 🔴 Red dot: Connection failed, check configuration or network
- 🟢 Green dot: Connection normal, model is available
Troubleshooting Suggestions:
- Check if the network connection is stable
- Verify that the API key is valid and not expired
- Confirm the service status of the model provider
- Check firewall and security policy settings
🤖 Supported Model Providers
🤖 Large Language Models (LLM)
Nexent supports any OpenAI API-compatible large language model provider, including:
You can follow these steps to integrate models:
- Visit the model provider's official website and register an account;
- Create and copy the API Key;
- Check the API endpoint in the documentation (i.e., model URL, usually ending with
/v1); - Click "Add Custom Model" in the Nexent model configuration page, fill in the required information, and you're ready to go.
🎭 Multimodal Vision Models
Use the same API Key and model URL as large language models, but specify multimodal model names, such as Qwen/Qwen2.5-VL-32B-Instruct provided by SiliconFlow.
🔤 Vector Models
Use the same API Key as large language models, but the model URL is usually different, typically ending with /v1/embeddings, and specify vector model names, such as BAAI/bge-m3 provided by SiliconFlow.
🎤 Speech Models
Currently only supports VolcEngine Voice, and needs to be configured in .env
- Website: volcengine.com/product/voice-tech
- Free Tier: Available for personal use
- Features: High-quality Chinese and English speech synthesis
Getting Started:
- Register a VolcEngine account
- Access Voice Technology services
- Create an application and get API Key
- Configure TTS/STT settings in environment
💡 Need Help
If you encounter issues with model providers:
- Check provider-specific documentation
- Verify API key permissions and quotas
- Test with provider's official examples
- Join our Discord community for support
🚀 Next Steps
After completing model configuration, we recommend you click "Next" to continue with:
- Knowledge Base Configuration – Create and manage knowledge bases
- Agent Configuration – Create and configure agents
If you encounter any issues during model configuration, please refer to our FAQ or join our Discord community for support.